# Custom product filters
As it is necessary to have a system to help the website administrator to enable easier navigation among the products of a category and to use filters in the showcase to present to the customers, the Larammerce project proposes an approach called CustomFilters. So that to create a filter of products and display them on each of the product category pages, 'CustomFilters' must be added and the products are selected using it.
Product filtering (also known as faceted search) allows shoppers to refine product searches based on multiple attributes like price, color, size, and reviews.
In terms of programming, custom queries are similar to custom product filters, so the prerequisite for this tutorial is how to work with custom queries in the Larammerce template engine.
For more information about the custom product queries in Larammerce, see "Custom product queries (opens new window)".
This section will discuss the examination and use of 'CustomFilters'.
To manage 'CustomFilters', enter the admin panel and enter the custom product filters icon in the store tab.
On the destination page, as seen in the picture below, there is a list of current existing 'CustomFilters' that the administrator can manage. Of course, a button helps the administrator add a new item.
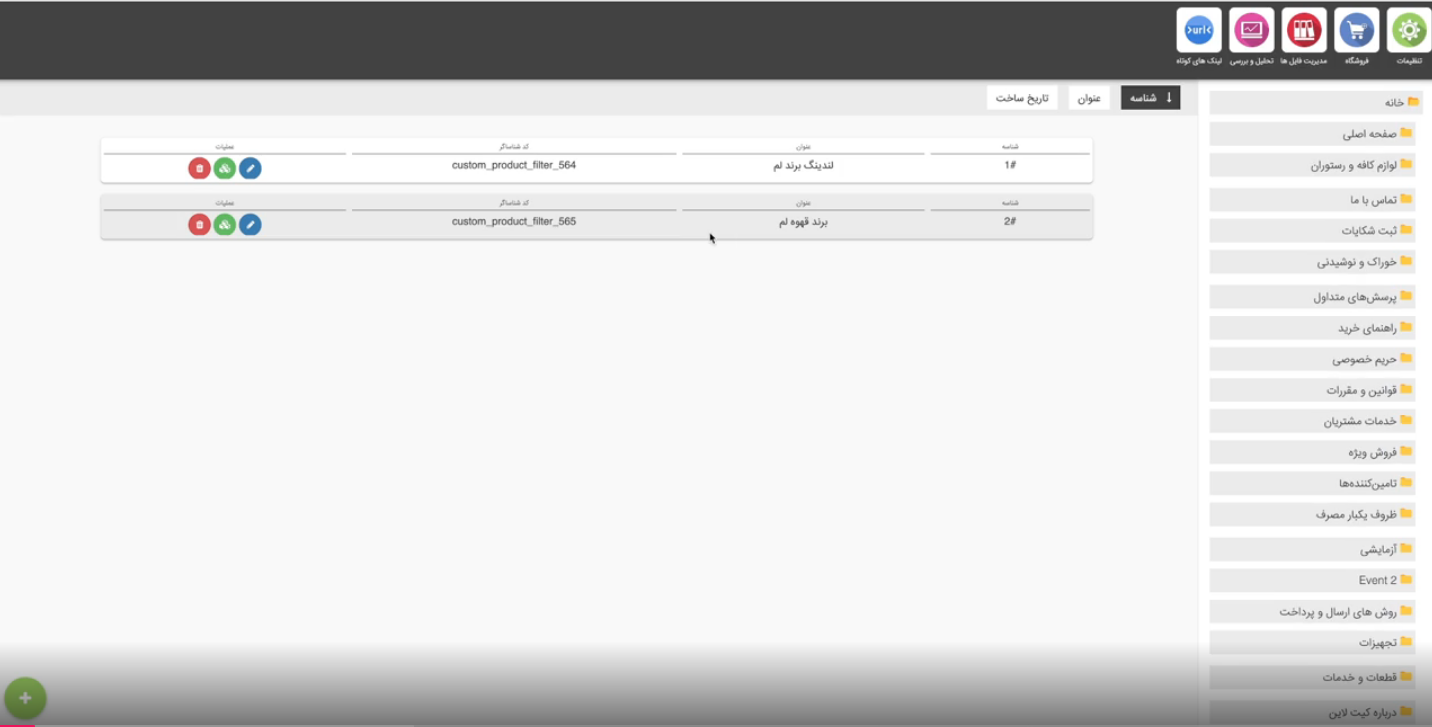
Custom request settings can be changed if the edit icon is clicked.
As it can be seen, each "CustomFilters" consists of fields including a "title" and an "identifier" as well as "query selection".
Let's take a look at how the 'CustomFilters' work:
For a description, in a nutshell, it is important to mention that each of the 'CustomFilters' is persisted in a table named Custom_filters. The table consists of the fields described below:
The source code below can be seen in the app/models/ProductFilter.php file.
# SOURCE
protected $fillable = [
  'identifier', 'title', 'product_query_id', 'data',
  //these are not table fields, these are form sections that role permission system works with
  'filter_data'
];
2
3
4
5
There are three helper functions for managing custom filters, which are defined in the back-end (Larammerce project) of the site.
# 1. get_product_filter($identifier)
The function get_product_filter($identifier) returns the product filter object
# SOURCE
function get_product_filter(string $identifier): ProductFilter
{
    try {

        return ProductFilter::findByIdentifier($identifier);
    } catch (Exception $e) {
        return new ProductFilter();
    }
}
2
3
4
5
6
7
8
9
# 2. custom_filter_products($identifier)
If the 'CustomFilters' identifier is passed to the custom_filter_products($identifier) function, it will return a list of the 'CustomFilters' products that are the result of the products filter action matching the $identifier.
NOTE: This function can be used to render and display products in the back-end of the website (Larammerce project), but if the number of products is large, paginate or lazy loading should be used, otherwise it will cause the website to crash.
For more information about Pagination, see "Database: Pagination (opens new window)".
# SOURCE
function custom_filter_products(string $identifier)
{
    try {
        return ProductFilter::findByIdentifier($identifier)->getProducts();
    } catch (Exception $e) {
        return [];
    }
}
2
3
4
5
6
7
8
# 3. custom_filter_products_ids($identifier)
It may be necessary to return a list of filtered product IDs instead of all products, for example, to implement lazy loading of a website. For this purpose, a function called custom_filter_products_ids($identifier) is defined in the Larammerce project, which returns a list of filtered product identifiers.
# SOURCE
function custom_filter_product_ids(string $identifier): array
{
    try {
        return ProductFilter::findByIdentifier($identifier)->getProductIds();
    } catch (Exception $e) {
        return [];
    }
}
2
3
4
5
6
7
8
The list of product identifiers can be given to the web server (API) in a specified number and the web server can be requested to return the list of identifiers in a paginated form. For this purpose, the list of product identifiers is placed in a script so that they can be called a certain number of times in JavaScript.
Pay attention to the following example:
 <script>
    const neededProductIds = {{json_encode(custom_filter_product_ids("custom_product_filter_564"))}}
 </script>
2
3
And enter this command:
./deploy.sh
NOTE: With the help of the custom_filter_products_ids($identifier) function, the list of product identifiers is provided to JavaScript.
In the next step to understand more, enter "inspect" in the browser, and in the "Console" tab, with the help of the console.log(neededPeoductIds) command, the list of products identifiers will be displayed in a certain number (for example, twenty numbers).
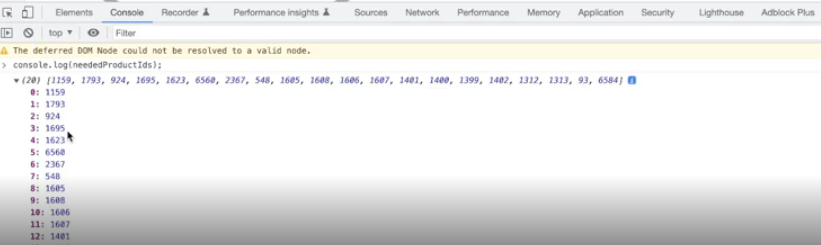
In this example, there are 20 product identifiers sent to the product filter web server at the following address.
/api/v1/shop/filter-products?directory_id=2&sort%5bfield%5D=id&sort%5Bmethod%5D=desc&price_range%5B%5D=0&price_range%5b%5D=999999999&paje=2
Now, let's follow a few steps to create 'CustomFilters':
First, create a .blade file named:
public/views/event.blade.phpPut the following in the file:
<ul>
@foreach(custom_filter_products("custom_product_filter_564") as $product)
    <div>
        <h1>{{$product->title}} / {{number_format($product->latest_price, 0)}} </h1>
        <h5>{{number_format($product->previous_price, 0)}}</h5>
        <img src="{{ImageService::getImage($product, "original")}}" alt="{{$product->title}}">
        <a href="{{$product->getFrontUrl}}">{{$product->title}}</a>
    </div>
    <hr>
@endforeach
</ul>
2
3
4
5
6
7
8
9
10
11
As it can be seen, the custom_filter_products("custom_product_filter_564") function, returns a list of proper products related to the specified 'CustomFilters' according to the passed custom_product_filter_564.
Open the admin panel in the browser and then create a new folder
 with title 'Event' and URL 'event-1'. Also, make sure to create a 'CustomFilters' with an 'identifier' and 'title'.
And enter this command:
./deploy.sh